6 minutes
How to Create a Unity3D Universal Windows Standalone Player
October 22, 2017
As you might have known if you have done a bit of work with Unity is when building a standalone player it has a Universal package type for both macOS and Linux.
This I believe comes down to how Windows executable work. When loading DLL files you can only load them from the architecture you are using. So what this has meant in most versions of unity is you have to compile a 32bit and a 64bit version of the game and distribute them. This has meant some developers have just picked 32bit and left it as it has the highest compatibility across their player base.
Unity 2017
Well in Unity 2017.2 there has been an interesting development. Unity now ships their engine in a DLL file instead of an exe. Then they create a simple exe that just calls the DLL file.
Player Launcher Source Code
So first of all this means the source code for the actual editor is located here: %YOURUNITYFOLDER%\Editor\Data\PlaybackEngines\windowsstandalonesupport\Source\WindowsPlayer
And this is what the code looks like:
int WINAPI wWinMain(HINSTANCE hInstance, HINSTANCE hPrevInstance, LPWSTR lpCmdLine, int nShowCmd)
{
    return UnityMain(hInstance, hPrevInstance, lpCmdLine, nShowCmd);
}
So looking at the above you can see how easy it is to write your own exe to replace it. I had a play around with this in c# to see what these properties are and I found the following:
- HINSTANCE hInstance - You can get this value in C# by calling
Process.GetCurrentProcess().Handle - HINSTANCE hPrevInstance - I have just been setting this to
IntPtr.Nulland it has been working. - LPWSTR lpCmdLine - You can pass command line arguments in here. You can look at the Unity Standalone player section of the Unity Manual here.
- int nShowCmd - If you set this value to 1 it will show up as expected, 0 it will appear minimized in the task bar.
What is different between 32bit and 64bit builds
The difference between the two builds is the DLL file itself and mono directory which is located under the games data folder. This makes sense when you think about it the DLL contains the engine main code and is platform specific and the mono directory contains the embedded version of mono which is used to load the rest of the Managed .net content that that game code is in.
So if we wanted to use the same game files for both x32 and x64 we would only need to swap the Mono folder out and the DLL file.
C# Solution
This brings us to the next part of the solution. If we want an executable that can be both 32bit and 64bit we should look to the .NET framework. This will JIT (just in time compile) to whatever architecture the system is running on.
New solution
So to get started open Visual Studio 2017 (you can download it for free from Microsoft).
Create a new Windows Forms App.
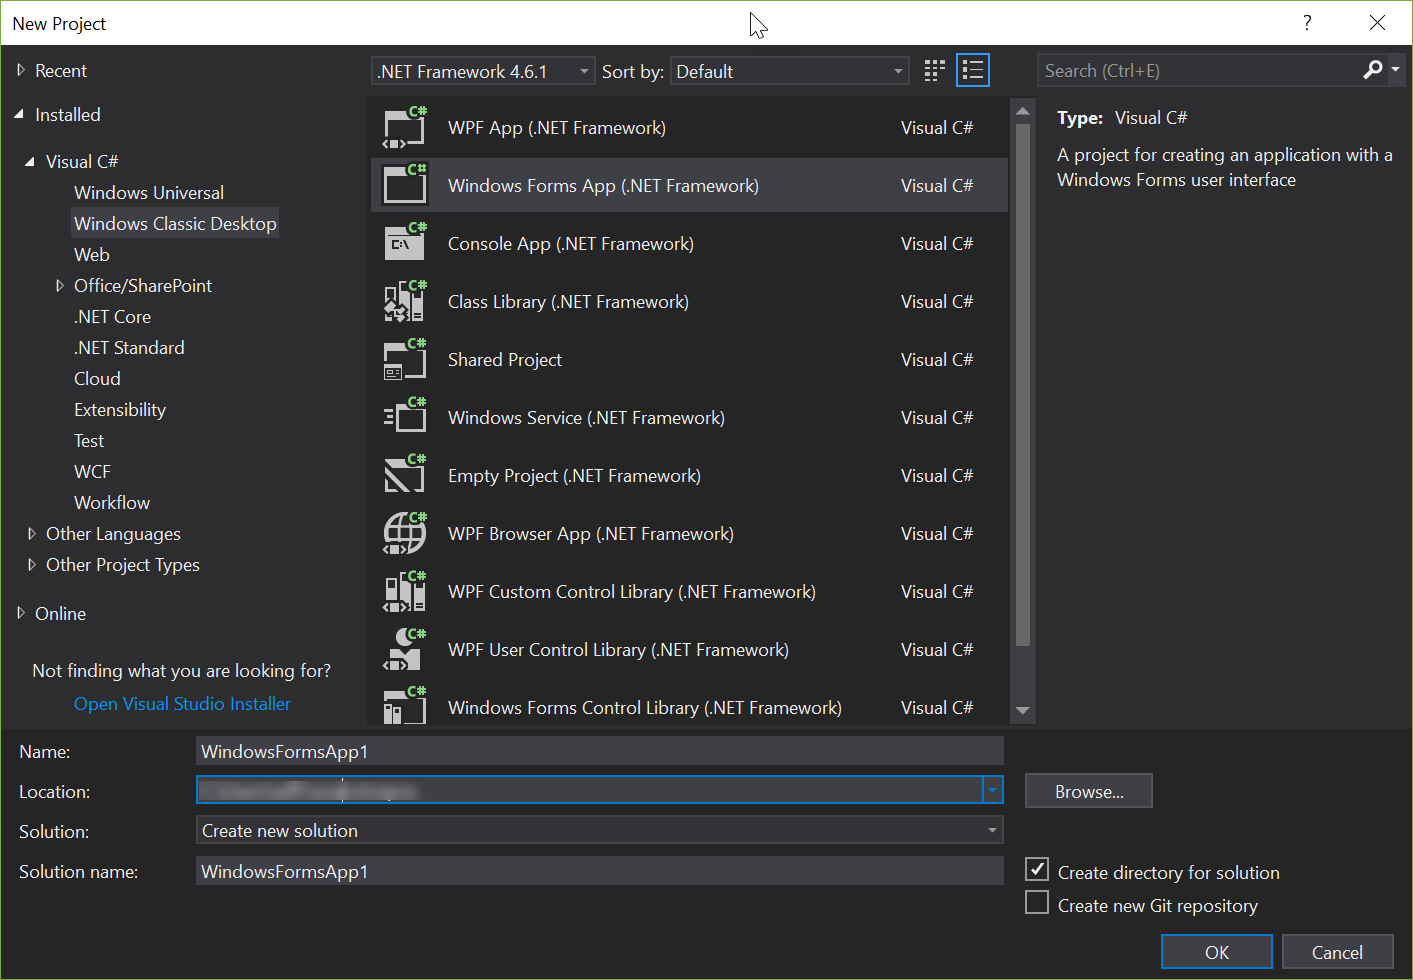
Note: It is important you select Windows Form App instead of Console App. If you pick console app the user will see a console window popup.
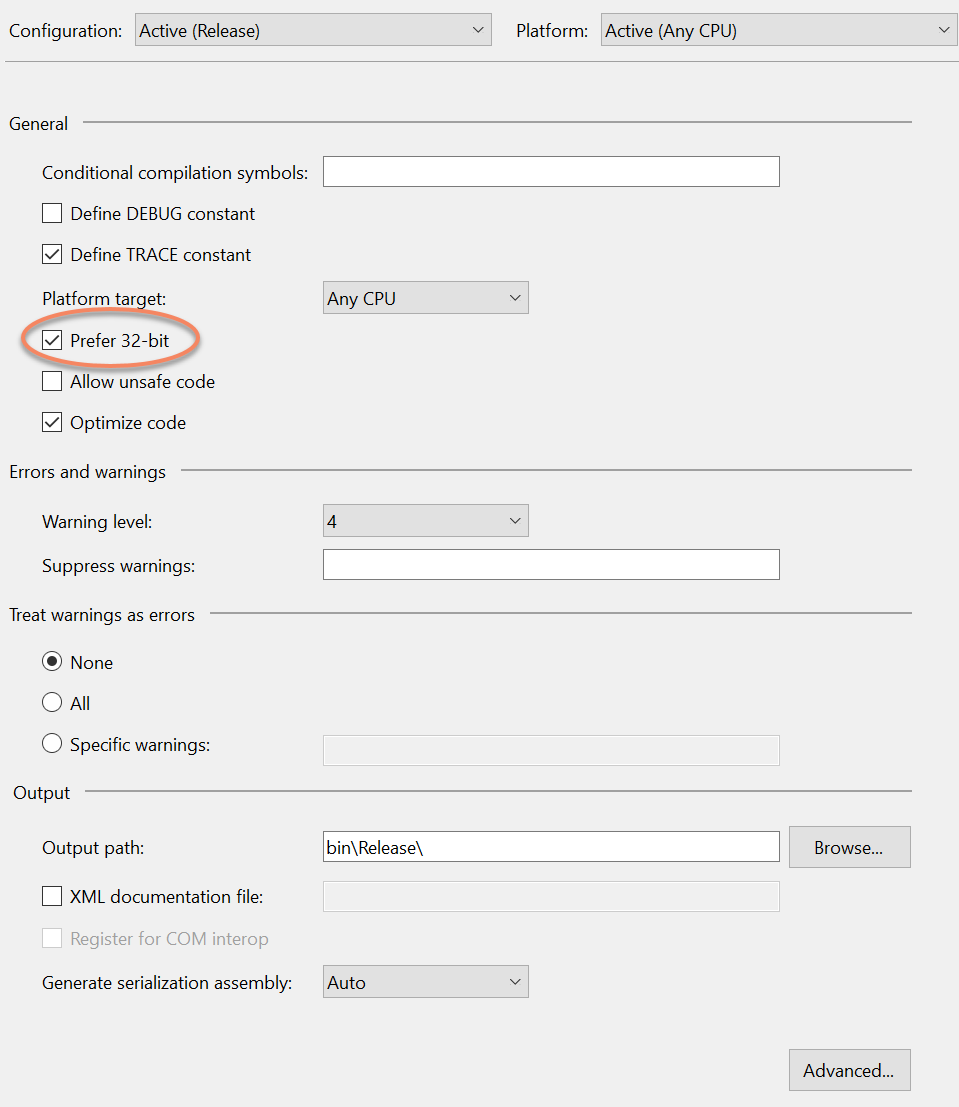
Once the project is created you need to go into the project properties and then build settings. Once inside there you need to untick Prefer 32-bit.
Failing to do so will always launch the 32bit version of the game defeating the whole point of doing this.
Now delete Form1 from the project and replace the contents of program.cs with the following:
using System;
using System.Diagnostics;
using System.IO;
using System.Runtime.InteropServices;

namespace UnityLauncher
{
    internal class Program
    {

        [DllImport("UnityPlayer")]
        private static extern int UnityMain(IntPtr hInstance, IntPtr hPrevInstance,
            [MarshalAs(UnmanagedType.LPWStr)]ref string lpCmdline, int nShowCmd);

        private static void Main()
        {
            if (IntPtr.Size == 8)
            {
                if(!File.Exists("UnityPlayer.dll"))
                    File.Copy("UnityPlayerx64.dll", "UnityPlayer.dll");

                if (!Directory.Exists("UnityLauncher_Data\\Mono\\EmbedRuntime"))
                {
                    Directory.CreateDirectory("UnityLauncher_Data\\Mono\\EmbedRuntime");
                    File.Copy("UnityLauncher_Data\\Mono\\EmbedRuntime_x64\\mono.dll",
                        "UnityLauncher_Data\\Mono\\EmbedRuntime\\mono.dll");
                    File.Copy("UnityLauncher_Data\\Mono\\EmbedRuntime_x64\\MonoPosixHelper.dll",
                        "UnityLauncher_Data\\Mono\\EmbedRuntime\\MonoPosixHelper.dll");
                }
            }
            else //4
            {
                if (!File.Exists("UnityPlayer.dll"))
                    File.Copy("UnityPlayerx86.dll", "UnityPlayer.dll");

                if (!Directory.Exists("UnityLauncher_Data\\Mono\\EmbedRuntime"))
                {
                    Directory.CreateDirectory("UnityLauncher_Data\\Mono\\EmbedRuntime");
                    File.Copy("UnityLauncher_Data\\Mono\\EmbedRuntime_x86\\mono.dll",
                        "UnityLauncher_Data\\Mono\\EmbedRuntime\\mono.dll");
                    File.Copy("UnityLauncher_Data\\Mono\\EmbedRuntime_x86\\MonoPosixHelper.dll",
                        "UnityLauncher_Data\\Mono\\EmbedRuntime\\MonoPosixHelper.dll");
                }
            }

            if (args.Length == 1 && args[0] == "-norun")
                return;

            var commandArgs = "-screen-fullscreen";
            UnityMain(Process.GetCurrentProcess().Handle, IntPtr.Zero, ref commandArgs, 1);
        }
    }
}
Now to walk through what this code does.
        [DllImport("UnityPlayer")]
        private static extern int UnityMain(IntPtr hInstance, IntPtr hPrevInstance,
            [MarshalAs(UnmanagedType.LPWStr)]ref string lpCmdline, int nShowCmd);
The DLL import at the top is how C# is able to call the unity c++ code.
            if (IntPtr.Size == 8)
            {
                ...
            }
            else //4
            {
                ...
            }
This if statement is checking if the executable is being called from a 32bit or a 64bit executable. If it returns 8 its 64bit otherwise (4) it is 32bit.
                if(!File.Exists("UnityPlayer.dll"))
                    File.Copy("UnityPlayerx64.dll", "UnityPlayer.dll");

                if (!Directory.Exists("UnityLauncher_Data\\Mono\\EmbedRuntime"))
                {
                    Directory.CreateDirectory("UnityLauncher_Data\\Mono\\EmbedRuntime");
                    File.Copy("UnityLauncher_Data\\Mono\\EmbedRuntime_x64\\mono.dll",
                        "UnityLauncher_Data\\Mono\\EmbedRuntime\\mono.dll");
                    File.Copy("UnityLauncher_Data\\Mono\\EmbedRuntime_x64\\MonoPosixHelper.dll",
                        "UnityLauncher_Data\\Mono\\EmbedRuntime\\MonoPosixHelper.dll");
                }
The code inside each of the if statements then copies the 64bit or 32bit files into place ready to launch the game.
            if (args.Length == 1 && args[0] == "-norun")
                return;
This step will quit the game if the caller passes -norun parameter to the executable. This is put in place so you can
call the command line from inside an installer to put the files for the system architecture in place without actually
starting the game.
This consideration is there for the fact if the game is installed in c:\Program Files the user won’t have the rights to move files around or rename them. However in the instance of a game jam where users pass portable zip files around they will.
            var commandArgs = "-screen-fullscreen";
            UnityMain(Process.GetCurrentProcess().Handle, IntPtr.Zero, ref commandArgs, 1);
Last but not least we are calling the unity DLL file and passing parameters to it. For the most part I just leave this blank but I have put in a parameter for example sake.
Note: If you are looking for the setting to hide the Unity launcher window it is actually in player settings in Unity itself not the command line.
No compile the project using the Release configuration and then processed to the next step.
How to manually create a Universal Windows Player
Once you have your universal launcher you need to get your game files ready to deploy.
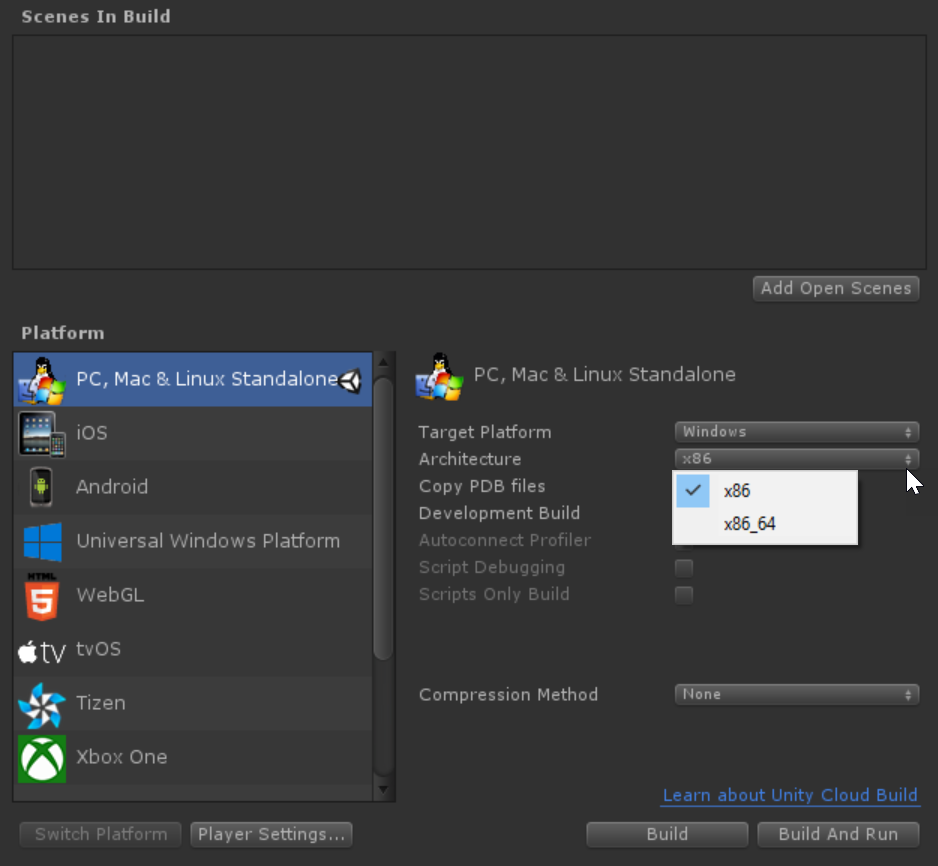
Easiest way to get all the files you need is to build a 32bit and 64bit version of the game like you usually would.
Once you have both versions of the game. Copy the gamename_data folder into your universal package folder. Key thing to remember this folder needs to have the same name as your exe file. If you named your exe AwesomeGame.exe the data folder needs to be called AwesomeGame_data.
Next copy the UnityPlayer.dll files from each game folder naming them UnityPlayerx64.dll and UnityPlayerx86.dll after their respective architectures.
Now in the gamename_data folder remove the existing Mono\EmbededRuntime folder. Then copy this folder from both the 64bit and 32bit folders and rename them to EmbedRuntime_x64 and EmbedRuntime_x86 respectively.
Last thing to then do is copy the new launcher exe into the folder and check that it all works.
Now you are ready to package this up and distribute it. Before you do however make sure to delete the UnityPlayer.dll and Mono\EmbededRuntime folder. This is so when the user runs it for the first time they can auto detect the version to use.
More automatic solution
I will soon create a Unity package which will automate the process of creating universal players and add it here.
I am posting this part of the tutorial mainly so I don’t forget how to do it myself :).
Further customizations
I am planning on also creating another post later on which will guide you through how to create your own launcher and how to pass data from that into the game.